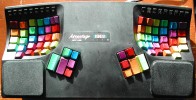
Long ago, when I got my first Kinesis keyboard, I thought "some day, I'm gonna paint one of these up somehow." My original idea was to spraypaint the whole thing matte black, then do the keys in shiny, metallic, rainbow colors. Unfortunately, I'm not much of a hardware guy, even to the extent of using paint reliably, so I pretty much realized I couldn't pull it off.
A week ago, I found out about the new Kinesis Advantage USB keyboard. Same basic keyboard I know and love - but available in black. I ordered one because I'm using a USB console switch, and I've had a great deal of trouble with PS/2 keyboard compatibility with it. But... when the keyboard showed up, I realized that now, I only had to spraypaint the keys, not the whole keyboard.
Here's how it looks:

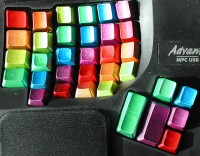
The keys are actually still legible; this wasn't my intent, and indeed, if it had been easy to make it not be the case, I would have, but you can see in this zoomed-in picture that the original decals are still slightly detectable under the paint:

This is a little boring, really. What you see there is:
The whole process took about 8 hours, plus drying overnight; I probably only spent about 40 minutes actually doing anything, plus maybe an hour of driving to the hobby store *twice* because I didn't realize I needed the silver primer at first.
Comments about this web page can be sent to:
seebs@plethora.net